The summer cottage has long ceased to be just a place for growing flowers and vegetables. There is a desire to transform the void, but often the finished landscape decoration can not afford. One of the solutions is to create the desired item with your own hands.
The basic rules for creating a landscape decor
Landscape decor - the formation of a harmonious style by ennobling your site with small architectural forms, plants and other ideas. This current contains a variety of nuances and rules, which should be more thoroughly understood.
The main components of landscape design include:
- Building - the main element of the composition, drawn up in order to hide the disadvantages of the structure or, conversely, emphasize the advantages.
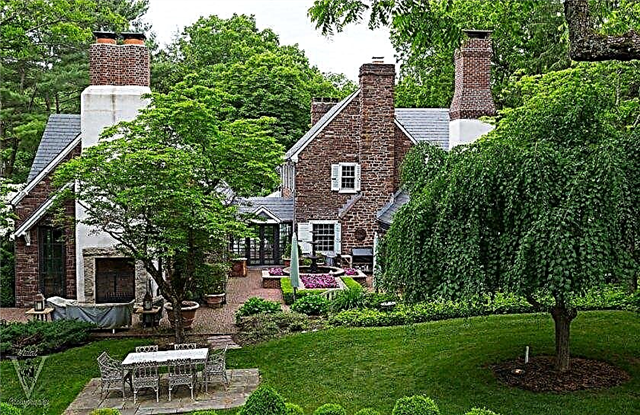
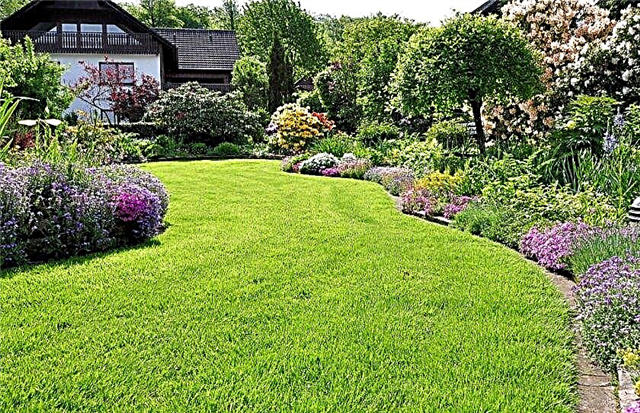
- Lawns from various herbs and garden paths.
- Large decorative details or MAF: stream, fountain, sculpture, gazebo, bench, etc.

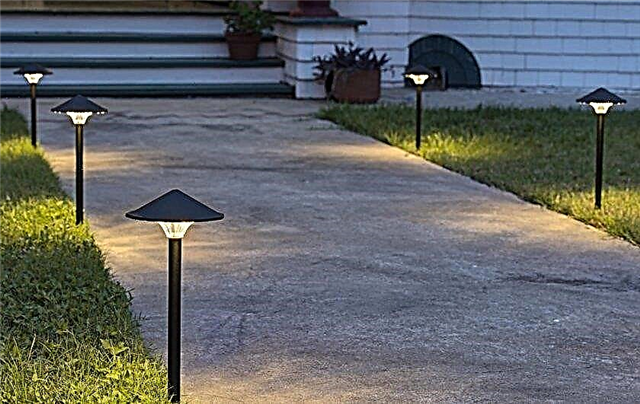
- Small parts: lamps, flower beds, candles, flowerpots, etc.
The first thing you should do when designing a chosen place is to create a well-groomed lawn and paths, but the selection of plants and other decor elements depends on the chosen style. If you have not decided on it yet - it's time.
Did you know? In landscape design, there is an effect called “Alice in Wonderland”: dwarf trees and plants are planted on a small area, which contributes to the visual expansion of the territory.
There are many, but only the main ones are worth highlighting:
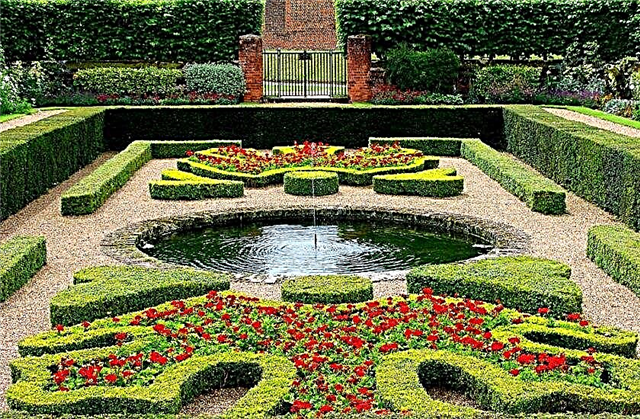
- Classical (regular) is characterized by regular geometry and distinct symmetry. The main elements: straight alleys, a fountain, plants for the topiary, natural stones, antique sculptures and classic arbors. The decor is dominated by white, beige, blue, sand colors.

- English - soft lines and smooth contours, naturalness of nature. The central elements include vertical gardening, a reservoir in a landscape style, a zigzag path made of natural materials, and many perennial plants. Silver and various shades of green are priority colors.

- French style is the most difficult because it must combine both sophistication and light charm. One of the most famous stylizations is considered to be “Provence”. Often consists of natural materials and a strictly designed lawn, spicy plants, fruit and ornamental trees, a small garden. The color palette is wide enough - it has both silver, dark green and blue, and yellow, red, purple.
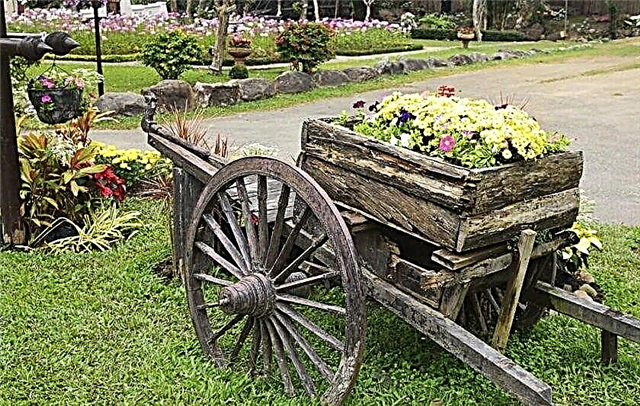
- Country, also known as rustic, is considered one of the oldest branches of landscape design, as it originates from small settlements of ancient people. The main components include: fruit garden or orchard, lush flower beds from field plants, handicrafts, paths from improvised materials (tree bark, gravel, tree cuts). MAF, wells, benches, wooden fences, etc. are used as accessories. Both bright colors and neutral ones, for example, shades of white, are suitable.
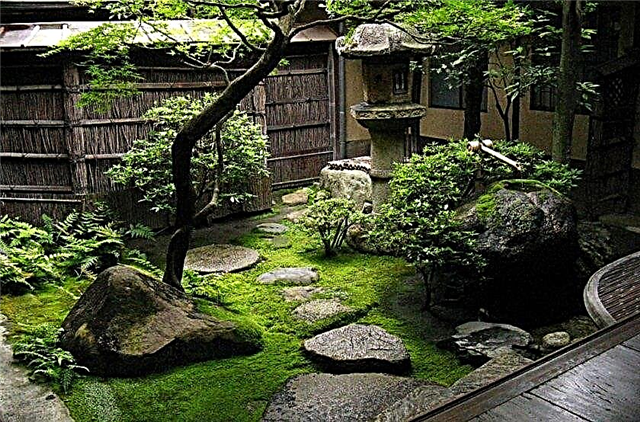
- Japanese and Oriental On the whole, they are created for a peaceful rest from the bustle of people, a spiritual haven. The main component is nature, as well as water in any convenient form (stream, reservoir, etc.). Asymmetry, the combination of stones and plants, hedges of bamboo or moss under the trees, as well as white ceramics are considered accessories. The color scheme consists of white, brown, gray and green, while the basic rule is the smooth transitions from one color to another, 1-2 tint accents.
Flowerbeds and flower beds
There are many options for designing flower beds for every taste of varying complexity. Here are the most popular and unusual, mainly from improvised materials. A flowerbed of tires is considered the most popular variety. Other interesting solutions can be flower beds made of pipe sections, plastic bottles, stones, logs and boards, old furniture, things and even utensils.
Important! When working with sharp objects, follow safety precautions. — protect your eyes and hands, otherwise serious cuts may occur.
It also happens that the gardener organized a very beautiful flowerbed, but he doesn’t like it at all - the wrong place, the discrepancy with the general style. That is why, before starting any work, it is important to determine the functionality of the future decor.
One of the components of choice is the type of flower garden:
Another important factor is the shape of the flowerbed. Here you can also experiment and choose the best option, but if you do not differ in imagination or doubt your abilities, you can use ready-made common schemes:
To decorate small flower arrangements, you can resort to a street flowerpot. The simplest option is to take unnecessary wooden boxes, barrels, a wheelbarrow, large dishes, etc. In this case, the creation process is surprisingly simple: the selected container is cleaned of contaminants, if any, treated with an antiseptic and covered with varnish or drying oil, after which the product remains to dry, and it is completely ready for planting plants.
You can go further and mold a pot of clay: both natural and white decorative will be suitable as a material. The second option is more preferable, since it does not require firing, it quickly hardens and is easily amenable to further decoration. Fragments of mirrors, small stones, shells and beads are suitable as design elements.
Creating a rock garden
The rock garden is a small plot used to grow alpine plants on a hill of stones, its second name is a rocky garden. Such a picturesque corner resembles a small island of wildlife of the Alpine mountains, from where the name came from.
To create with your own hands you will need such materials:
- various types of natural stones (granite, basalt, sandstone, limestone), as well as pebbles;
- coarse sand (suitable river);
- decorative flowers and plants;
- sphagnum moss;
- small shrubs and dwarf trees.
There are several main types of rock gardens:
Despite the fact that each rock garden is an independent and absolutely unique solution, there are a number of rules that are undesirable to ignore:
- Sketching is one of the most fascinating processes in which you can engage your imagination. The scheme should take into account all the beneficial components of the landscape.
- Choosing the right place. The future rock garden should be in an open area and visible from any part of the garden. There should not be flower beds or any other striking design solutions, walls or fences.
- If there is an elevation in the summer cottage, it would be much better to build an alpine garden there than to build a hill from scratch.
- In accordance with the sketch made earlier, marking is done. To do this, it is recommended to use sand, since it will provide an opportunity to more clearly present the future decor.
- The nuances of the soil. If your land consists of clay or chernozem, you will need drainage. To do this, dig a recess of about 30-50 cm, cover it with pebbles, cover it with earth and water it.
- The largest stones are located in the extreme parts of the future rock garden, and to give a natural look it is advisable to slightly deepen them into the soil.
- In the process of creation, plants are additionally used, but it is allowed to introduce auxiliary elements that are not out of style. It may be a sculpture, but not plastic.
- When all planned levels are created, it is necessary to form a peak - the final part of the composition. To do this, you can take one relatively large stone or 3-4 small, laid out by a pyramid.
Important! If your alpine slide is higher than 1 m, an additional core device is needed.
Dry creek
A dry stream is one of the elements of the decor, which allows using stones and flowers to create the appearance of flowing water. Such a design solution can easily be recreated independently, without having to bother with silt, flowering water and other care difficulties. Work on the creation will take no more than 2-3 days.
To do this, get:
- sand for marking;
- stones of various sizes of natural origin;
- plants;
- geotextile for the substrate (can be replaced with a thin layer of concrete);
- a shovel;
- rake.
The process of creating a dry stream is divided into three simple steps. The first is the planning of marking and its design on the ground. First, all ideas are best embodied on paper in order to choose the best among them. You can also look at the options on the Internet and choose the right one. Then they put down the dimensions in order to roughly understand how much free space is left.
It is also necessary to leave a free part for movement. When the sketch is ready, it's time to transfer it directly to the ground with sand. Keep in mind that a long and narrow dry stream will visually increase your area. Wide and direct options will be more appropriate to look at a large area. When you are satisfied with the outline, time to proceed to the next step.
Important! Laying long flat stones on the edge, you give the landscape decoration the effect of real water.
The preparation of the site involves the removal of the upper layer of soil (12-15 cm will be quite enough) to create the contour of the future stream and give it the most natural look. Next, the bottom is leveled with a rake. To protect the future decor from the appearance of weeds, the selected place is covered with geotextiles - of course, there is a risk of wind entering seeds into the stream, but the main advantage of this material is that they will not be able to take root. The final phase - the selection and laying of stone material. You can choose absolutely any breed, but certainly of natural origin: sandstone, sea pebbles, gravel, etc. In order for a dry stream to have as much resemblance to the present as possible, it is worth laying out stones of different sizes, without observing symmetry. Larger elements are suitable for building coasts, and small and medium ones are suitable for the stream itself.
It is not necessary to adhere to bluish shades, your creation can have any desired color scheme. Next, it remains for the small - decorating the resulting element. This can be done with flowers, a small bridge, lights or other objects. When choosing greens, give preference to ornamental shrubs, succulents, cacti, reed species.
Pond on the site
Sometimes you feel like having a rest near a pond after a hard working week, but there’s not enough time to travel anywhere. Then there is nothing left but to create it yourself in your garden or in the country.
The following types of decor base are available:
- plastic mold;
- PVC film;
- reinforced concrete bowl;
- improvised means (for example, an old bathtub).
For the independent manufacture of a reservoir, it is necessary to arm yourself with some kind of the above bases, sand, a shovel and a hose with water. The whole process can be divided into 5 stages. The first is the preparation of the pit. The location has been chosen, it is time to start digging the pit. Before this, the site is thoroughly cleaned of all unnecessary. Depth can be either single or multi-level.
The distribution of the second option is approximately as follows:
- the coastal part is 10–40 cm, plants can be placed;
- shallow water - 40–100 cm, laying out pebbles;
- deep water - 100 and more cm, is used for breeding fish.
The work is carried out with a shovel and in the process all stones and weeds are removed in order to further use the soil for other purposes. The choice of base material. As mentioned above, there are several forms that differ in many ways. Choose the one that suits you and place in the dug hole. Water supply system. In the pond there should be a circulation of water, which will provide any water pump. Before buying, calculate the volume of the reservoir.
On average, the pump capacity for such use is 300–350 l / h. Filtration is necessary to maintain the purity of water and the absence of an unpleasant smell of decay. To do this, you can purchase either a special filter in the store or resort to the help of plants (nymphaeum, water lily, vodokras, rdest, duckweed, yellow egg capsule, etc.). The second option is longer, but does not introduce residents of your decor to stress and does not require large cash costs.
The last stage - decorating. The pond should be beautiful not only outside but also inside. You can plant plants both directly in the water and along the coast, depending on the species. To give peace to the place, it is allowed to have fish adapted to your climate. In addition to the above, an interesting solution would be backlighting - for example, stand-alone battery-powered lights or recharged from sunlight.
Track Design Options
Paths in the garden are created for comfortable movement between objects, as well as increasing the attractiveness of the site.
Depending on the destination, the following types are distinguished:
- from the gate to the porch of the house (entrance);
- connecting house and other buildings;
- walking;
- between the beds.
The arrangement of paths begins with the development and creation of a scheme. You can simplify your task with the help of a number of programs designed for drawing - they do not require special computer skills, but will help to carry out the correct breakdown of the territory. The optimal width of the main track should be in the range of 80–140 cm, and the auxiliary one should be up to 75 cm.
The choice of material directly depends on your desired functionality and terrain features. The most popular are flagstone, paving slabs, clinker bricks, decking, concrete, modular structures, plastic, gravel, crushed stone, rubber, wood, bottles. There are many options for laying such tracks, but beginners are advised to refer to the basic schemes - they are simple to execute and the result will not disappoint.
These include:
- Linear-angular - “Christmas trees” are laid out from the bars at an angle of 90 ° or 45 °.
- Linear with a shift. One of the most familiar, the tile is laid in a row, and the next is installed with a seam in the middle of the long side of the first row.
- Checkerboard pattern for multi-colored coating.
- “Braid” - alternation of transverse and longitudinal bars.
- The end position is used to clearly indicate the boundaries of the picture or the track itself.

Ideas of small architectural forms
MAF - auxiliary architectural structures that can be used as independent units or complement the existing decor. They are used in the design of open street spaces and private territories.
Did you know? The concept of "landscape design" appeared about 200 years ago, and art itself — centuries before our era in Egypt.
The fountain
If you want to update the exterior, make it more memorable and special - a small home-made fountain will perfectly cope with any of the tasks. However, it is not always possible to purchase a ready-made decor. The fountain fontanel is quite simple in execution and subsequent care, besides it can be disassembled for the winter. Having chosen the optimal place to be viewed from any corner of the site, they dig a little more foundation pit for the fountain, and additionally dig a shallow trench around it (about 10 cm). Sand is poured to the bottom, thereby forming a 15 cm thick pillow. The recess is leveled and a plastic bowl is placed on the sandy rise - a blank of the fountain itself. The container should be installed so that its edges protrude 5-8 cm above the ground.Water is poured into it, leaving 5-6 cm to the edge. Next, the pump is installed and checked. If the power of the pump is regulated, it is recommended to adjust it so that all the water falls back into the bowl.
A cloth with a diameter of a bowl is cut out of the waterproofing fabric and stripes are created on it from the center to the edges, which should be lowered into the container and secured with sealant. To ensure that the structure subsequently holds its shape, several rods of reinforcement are laid and everything is covered with a galvanized mesh with small cells, and then decorated. Often stones of different sizes are laid out, and plants are planted at the edges, but you can also resort to other variations. The construction of other types of fountains differs from the one given here, but the initial stages are the same everywhere.
Pergolas and benches
In the first place in popularity is a gazebo made of wood. To begin with, you can draw an approximate image of the structure, and then transfer it to a computer program - so the drawing will turn out to be the most correct. To save time, experienced gardeners advise to install ready-made concrete blocks on a tamped pillow. When the supports are exposed, they put waterproofing on them and begin to install the racks. The next stage is the attachment of the upper and middle trim, and then painting the floor and the finished frame. The roof is created from several rafter systems-triangles. They are installed directly on the frame, and then stuffed into 2 crossbars on either side of the ridge. The final stage involves the installation of roofing material (for example, a metal profile). If desired, you can nail the finish of the lower part of the lining, previously painted with oil for wood. Well, what a gazebo without a bench. Naturally, it is also made of wood, preferably pine.
Step-by-step instruction:
- Plan and sand the selected boards so that there are no irregularities and splintering.
- In the future back, make joints (grooves) with a plane.
- From strong bars to prepare supports - they should have a flat part for fastening.
- Optionally, you can make curly handrails with a jigsaw.
- Preparation for assembly - processing of screws with a special solution from corrosion.
- Installation begins with the legs of the product, and the seats and backs are already attached to them.
Video: arbor in one day
Decorative bridges
Traditionally, the bridge is made over dry streams and reservoirs, but you can also find unusual options - for example, over single flower beds and flower beds, paths and natural ravines. The crossing over the pond should be installed in the narrowest place, because the smaller it is, the stronger. As a material, you can choose wood, bamboo, stones, metal or concrete. This design comes in many forms.
Depending on the general style of the site, there are classic straight options, curved, zigzag, suspension bridge, step-by-step, step and arched. HTo create your own decor, you need to choose a suitable place, draw up a work plan and draw a detailed drawing of the product. The easiest to perform is the wooden version - it does not need a concrete foundation or piles. As a basis, 2 beams are used, the length of which is about 2 meters. Subsequently, the entire structure will be attached to them. The bend is attached using a jigsaw, and then, if necessary, painted in the desired color. It is recommended to take PVC pipes as guides, reinforcing them with thick metal rods. Flooring is done by nailing boards across the beams across.
When building, do not forget that during and after the rain the steps will be slippery - to avoid falls and other dangers, corrugated boards are nailed over the floor. Set the finished decor element on 2 embankments of stone and gravel. Decoration can be considered a railing. This is optional, but if you have children, it is better to play it safe. The side faces should be large and high (up to 80 cm).
Sculptures
Sculpture is a relevant exterior element in modern European gardens. Not only classical marble views, but also abstract figures on pedestals are implied. To create at home, the following materials are used: concrete, gypsum, papier-mâché, waste rubbish, wood, tires. The process of creating from any material you choose is simple, especially if before you start creating you will definitely imagine the desired sculpture and watch the training videos.
It is necessary to strictly adhere to one general style of design, to avoid piling up the site and using too oversized creations in a small area - otherwise, a feeling of cheapness and bad taste is created. Following the above instructions, it will not be difficult for you to create an ornament for your personal garden area no worse than store ones.


