Dill is one of the most common varieties of home herbs, which is not surprising given the wide range of its use. The grown branches are added to the first and second courses, used in recipes of traditional medicine and even prepared from them cosmetics, so the question of growing fragrant herbs will never lose its relevance. What you need to know about cultivating a bush variety of dill, and which varieties should be paid attention in the first place - read about this in the article.
The best varieties
All varietal variations of bushy dill can be divided into early ripening, mid-ripening and late ripening plants. Each group has its own advantages, which is easy to verify by studying the characteristics of known varieties.
Bush miracle
The variety belongs to the cold-resistant varieties of dill, the seeds of which are able to germinate at a temperature of + 3 ... + 5 ° C, although + 18 ... + 25 ° C are still suitable values. During the season, you can sow a variety several times, adhering to the interval of 10-15 days. So you provide yourself with greens for the whole season, and also will remain for the fall.

The main condition for organizing care is sufficient and timely watering, because with limited moisture, heavily dissected large leaves will quickly become smaller and coarser, due to which dill will not only lose its decorative properties, but will also become unsuitable for use in culinary purposes (the taste of coarsened leaves not so gentle).
The Bush miracle variety is highly resistant to diseases and pests, as well as its versatility, for which gardeners are highly regarded.
Did you know? Dill has anti-inflammatory and antioxidant effects. The infusion from this plant alleviates the unpleasant manifestations of cystitis, lowers blood pressure, relaxes the intestines and promotes milk production in lactating women.
Alligator
It belongs to the group of medium-late varieties, since no less than 42–45 days pass from the appearance of the first young plants to the collection of the first green crop. A feature of dill Alligator is a long period of absence of umbrellas, without which the leaves can be cut not in two, but in 3 or even 4 doses per season.

The best time to plant seeds in open soil is mid-April or early May. the true rosette of the variety is large, slightly raised above the surface of the soil, so that the lower green-gray leaves often remain clean and retain aromatic properties. From 1 m², on average, up to 2 kg of juicy greens is collected.
Russian size
The Russian size is dill with sprawling bushes reaching a diameter of 50 cm. The leaf rosette is quite powerful and consists of large, strongly dissected, threadlike leaves located on erect rounded stems, often growing up to 1 m in height.

The variety does not form peduncles for a long time, which positively affects the taste. It can be used in the preparation of first and second courses, salads, preservation.
It is advisable to plant a variety in an open fertile substrate no earlier than mid-July, planting seeds to a depth of 2-3 cm. In the future, it is useful to feed dill with organic compounds to form a large amount of green mass.
Important! To get bushes of maximum size, at least 30 cm of free space should remain between adjacent plants, which should be taken into account even at the stage of sowing seeds.
Christmas tree
Another mid-early variety, the growing season of which is 33–40 days. After this time, the greens are ready for cutting, however, if you want to prepare dill for spices, then you will have to wait a while to harvest it: at least another 20 days.

Dill leaf plates are always large, dark green with a bluish-blue tint. On a sturdy stem, internodes are often found close to each other. The bush resembles a dense, densely leafy ball. After the cut, the collected greens keep freshness for a long time, which means that you will have more time for its application.
The variety is suitable for fresh consumption, drying, salting and freezing for the winter. Fennel seeds Fir-tree are characterized by high aromatic properties, therefore they are often used as an additive to tomato and cucumber preservation.
Salute
A distinctive feature of the variety is the long-term preservation of the green color of the foliage. From the appearance of the first seedlings to the cutting of the first crop of greens, 55-60 days pass. Bushes of dill Salute grow up to 56 cm in height, and one rosette can combine about 30 vertically arranged leaves. All of them are large, with a wax coating on the top. Long petioles grow to 14–16 cm.
One plant gives about 100 g of greenery, and there are no arrows on the bushes. This allows you to cut leaves in 2-3 receptions, stretching the use of fresh dill for the whole season. From 1 m² of plants, about 2.8 kg of fresh herbs are harvested.
Kibray
Like previous varieties, Kibray is able to quickly grow green mass, which means that after 30-40 days you can perform the first cut of fragrant leaves. The leaf outlet is wide and spreading, so if planting is excessively thickened, they will have to be thinned out (without this, you will not be able to get the maximum yield). The optimal interval between neighboring plants is 20 cm, and in such conditions up to 5 kg of aromatic greens can be collected from 1 m².

The leaves of the variety are large, with a slight yellow tint and a slight waxy coating. As for the shape of the leaf blades, they are long and have a specific, pronounced dissection. Among the advantages of the variety are high resistance to diseases and pests.
Buyan
The ripening period of dill Buyan is 60–75 days. A characteristic feature of the plant is a pronounced dill aroma and high juiciness of the leaves. Cut branches retain their basic qualities for a long time, so you do not have to use them in the first days after harvesting.

Under good growing conditions, from one bush you can collect up to 250 g of greenery, represented by dark green leaves with a bluish bloom. If you look closely at them, you will notice a wax coating, which makes dill even more decorative.
Given the ability of the bush to grow, it is advisable to leave no more than 30 plants per 1 m², avoiding excessive thickening of plantings. Dill responds positively to the introduction of liquids and rare organic top dressing, each time delighting the gardener with an abundant and succulent crop of greens. During the season it can be collected at least 3-4 times.
Did you know? Dried dill is a means to repel insects in the house, therefore, branches gathered in bunches have long been hung in the corners. In addition, for the same purpose, it is useful to plant a plant between rows of garden crops.
How to plant?
The yield of the selected dill variety depends on compliance with the requirements for planting and further care, so whichever of them you like, it is worth considering the following information.
The timing
Often dill is sown in the garden in the spring or early summer, although the option of winter planting is not excluded. With the arrival of the first steady heat, the culture is placed on the site only after the air temperature has not dropped below + 2 ... + 5 ° C during the week, and the soil has thawed at the selected location.

On average, the calendar planting dates are in mid-March or early (mid) May, and more precise numbers will have to be determined based on the geographical location of the region of your residence.
In the summer, greenery is planted at any time, re-sowing dill every 15–20 days. In some cases, winter sowing of plants is performed on fresh spring greens. In this case, the best time to complete the procedure is October or November.
Site selection
Regardless of the variety of dill, the selected area for its planting should be well lit by sunlight or slightly hidden from them in partial shade. It is not worth planting a plant in full shade, since a deficit of light will negatively affect its external characteristics: the bushes will grow weak, and their color will become paler.

The soil in the selected area should be loose, nutritious and moderately moist, without the possibility of accumulation of excess moisture. For this reason, you should not plant a crop where groundwater is close to the surface of the site, and if there is no other option, then you can not do without the organization of a drainage layer.
The acidity of the substrate should be neutral or close to this, since at elevated levels the culture will quickly acquire a reddish tint, and in alkaline it will become yellowish. It is impossible to achieve maximum yield indicators under such growth conditions.
Of the precursor plants, tomatoes, cucumbers, tomatoes and cabbage will be the best for dill, under which at one time a large amount of organic fertilizers and mineral nutrients were applied. You can also plant crops next to other vegetables, avoiding co-placement with celery or carrots. In addition, when choosing a site, it is worth making sure that they are not grown on it last year.
Important! At first, immature sprouts of dill are sensitive to drowning by weeds, so it is advisable to choose a place for sowing seeds so that there are no plant residues after previous crops.
Preparatory work
Preparation for the process of planting dill in the selected area begins with preplant seed treatment and soil treatment, providing for its loosening and fertilizing. Each of these processes has features.
Seed preparation
Peduncles of bush forms of dill are finally formed closer to the end of the warm season, therefore, in regions with a short summer, it is not possible to achieve full ripening of seeds. In order for the future planting material to mature before the onset of cold weather, one has to plant a plant for seedlings and only after its strengthening transplant the sprouts to a constant place of growth.
Seed collected in autumn is dried and stored in tissue bags until the next planting season, and 5-6 days before the intended sowing, it is taken out and soaked in warm water (+ 50 ° С). A fluid change is performed at least once a day, each time pouring planting material only with warm liquid. It helps to get rid of the oil film that covers the surface of dill seeds and bothers their germination.

After soaking for three days, the wet seed must be spread on wet gauze and covered with a cloth or sawdust. In this state, the seeds should be present for at least 3 days, and during this time they need to be regularly moistened, preventing the gauze from drying out. An hour before sowing, planting material must be dried and only then placed on a substrate. The first young shoots usually appear no earlier than 2 weeks after sowing the seeds.
Bed preparation
Dill bush varieties prefer loose and fertile soil that absorbs moisture well. Given the long root system of this plant, it is worth paying attention to the thickness of the nutrient layer, which can be fertilized with mineral and organic fertilizers.
It is advisable to add 15–20 g of urea, 20–30 g of superphosphate and up to 3 kg of humus per 1 m² of area into the soil dug from the fall, a few weeks before the intended dill planting. Replace humus can be rotted mature manure, in the same proportions.
Important! Dolomite flour and lime under dill is better not to make, because because of these substances it is able to change the natural green color and will begin to lag behind in development.
Scheme and depth of landing
For convenience, the organization of furrows under the seeds, you can use a small wooden plank, the traces of the indentation of which will serve as planting holes. The distance between adjacent furrows should be at least 15–20 cm, which will allow for the formation of a sufficient number of side shoots. Having prepared two-centimeter wells, carefully spill the soil with water and place the seeds inside, leaving 2 cm of free space between them.
At the end of the planting, it remains to fill the recesses with a layer of soil and slightly compact. With a high probability of occurrence of return frosts, it is better to cover the dill planting places with a plastic film, periodically ventilating young plants. After the emergence of seedlings, it is useful to thin out them, especially if you did not care about observing a suitable planting pattern.

To accelerate the germination of dill, you can sow it first for seedlings and only after its strengthening, transplant seedlings to a constant place of growth. This option is suitable for regions with a harsh climate, in which frequent frosts can occur even in April. Sowing dill seeds for seedlings is performed about a month before the intended transplantation to a constant place of growth.
On average, planting of grown seedlings on a site is carried out no earlier than May, and by this time 5-7 true leaves should already be formed on the plant. Seedling planting scheme: 30 cm between adjacent seedlings and 20 cm between rows.
How to care in the open ground?
Caring for dill in the open field is not very different from caring for other vegetable crops or herbs. With timely watering, fertilizing and caring for the soil, problems with obtaining a plentiful crop will not arise. The main thing is to know about the nuances of each procedure.
Watering
Watering bush dill is performed as the top soil layer dries up, since excessive moisture is harmful to plants (overmoistening often leads to the appearance of a black leg in the area).

To complete the task, it is important to use only water heated in the sun, spraying it over the crops in the morning or after sunset. On average, at least 5 liters of fluid is consumed per 1 m² of plantings.
Important! When using tap water, it will have to be filtered or defended, since dill is sensitive to the content of chlorine, and when it is increased in the soil, it will stop growing.
Shelter film
In a temperate climate, when sowing dill seeds in April or May, additional seedling seedlings will not be needed. The exception is the regions with a cold climate, where even in the midst of spring there is the possibility of return frosts.
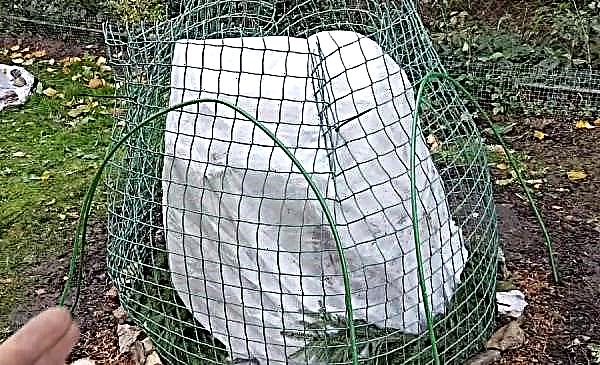
In addition, shelter may be necessary for plants planted on the site in the autumn period, since before the first frosts, not all of them manage to form a green mass for cutting. It is not difficult to build a film shelter: you need to pull a plastic film over an arc-shaped metal frame, which will be easy to disassemble.
Top dressing
If the soil in the selected area was well fertilized before sowing dill seeds, additional fertilizing is not needed. However, in substrates depleted in nutrients, it is necessary to add an additional amount of such elements, combining mineral or organic dressing with the next watering.

For fertilizer under the root, you can prepare a nutrient solution of 1 tsp. urea (or 0.5 liters of mullein) and buckets of clean water. At the same time, one must be careful with nitrogen-containing components, and if the dill greens do not turn yellow and grow well, there is no need to fertilize the crop once again.
Soil care
Soil care under dill plantations involves loosening and removing weeds that harm plantings before the first 3-4 true leaves appear. In the future, weeds can not so "drown out" the crop so intensively, therefore, weeding can be done less often.Loosening should be carried out with a small tool and very carefully so as not to harm the weak root system of each bush.
It is easier to take care of the soil soon after watering, when the moisture has already absorbed, but the substrate is still soft and supple. Moreover, in this case, you also maintain air exchange between the external environment and the root system of plants, which will contribute to their accelerated growth.Growing bush dill is a simple task, if you compare it with the cultivation of other vegetable crops. With little physical effort, you can provide yourself and loved ones with fragrant and healthy herbs, you just have to listen to the recommendations.


